Tracking Injection Sites by Body Shape: A Comprehensive Guide
Learn how to track injection sites by body shape, understand body types, and optimize GLP-1 injections for safe and effective weight-loss management.

Estimated reading time: 18 min
Key Takeaways
- Tracking injection sites by body shape can help avoid complications like lipohypertrophy and scar tissue by promoting even distribution of injections.
- Understanding body types (ectomorph, mesomorph, endomorph) and body shapes (apple, pear, hourglass) may inform safer injection site selection, needle length choice, and rotation strategies.
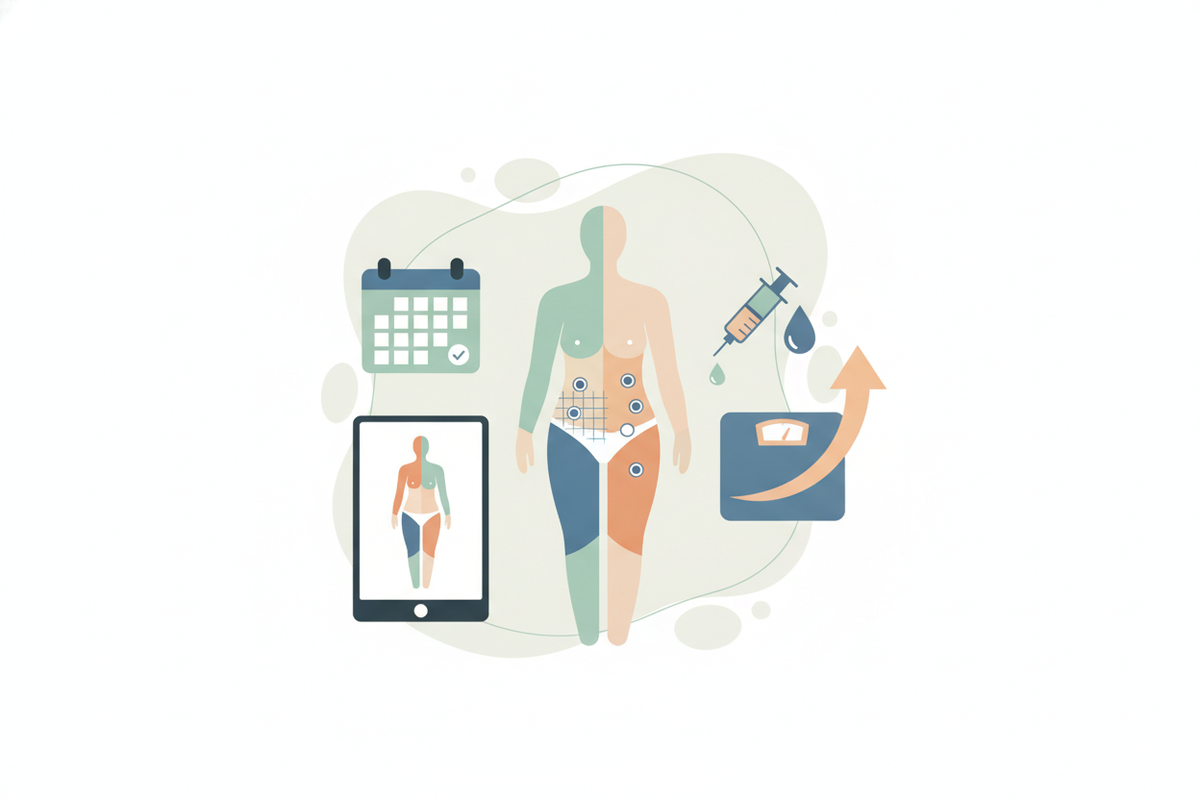
- Using body maps divided into quadrants or clock-face sections can support even spacing, systematic site rotation, and prevention of tissue damage.
- App-based trackers like Trimm offer interactive maps, reminders, and logs that can simplify injection site management and provide insights on patterns over time.
- Gluteal injection site choice depends on body shape and BMI; anatomical landmarks and individual fat distribution can guide safe placement and needle selection to help avoid nerve injury.
Table of Contents
- Section 1: Understanding Body Types and Shapes
- Section 2: Basics of GLP-1 Injection Site Rotation
- Section 3: Dividing the Body for Injection Site Tracking
- Section 4: Anatomical Landmarking and Safe Injection Placement
- Section 5: Gluteal Injection Site Selection and Body Shape Considerations
- Section 6: Tools and Apps for Tracking Injection Sites
- Conclusion
- FAQ
Section 1: Understanding Body Types and Shapes
What Body Type Am I? Ectomorph, Mesomorph, Endomorph Explained
Body types, or somatotypes, are a classic framework to describe general physique tendencies based on genetic predisposition and natural body composition. While these categories are broad, they provide a useful lens to understand how fat, muscle, and bone are distributed, which can impact injection site considerations. For a deeper dive, see our comprehensive Body Types and Shapes: The Ultimate Body-Positive Guide.
- Ectomorph: Characterized by a lean and slender frame with narrow shoulders and hips. Ectomorphs often have a fast metabolism, making it difficult to gain weight or muscle mass. They typically have less subcutaneous fat, which can influence needle length and injection depth.
- Mesomorph: Naturally muscular with a medium to large bone structure, mesomorphs have an athletic build and find it easier to gain muscle. They generally have balanced fat distribution, making them versatile in injection site options.
- Endomorph: Defined by a rounder or softer physique, with a tendency to store fat more easily, especially around the abdomen, hips, and thighs. Endomorphs often have wider waists and hips and may require longer needles or adjusted injection angles to reach the subcutaneous tissue effectively.
It is important to remember that these categories are descriptive rather than strictly prescriptive. Most individuals fall somewhere on a spectrum or blend characteristics from multiple types. Genetics play a significant role, but lifestyle factors such as diet, exercise, and body composition changes also influence appearance and injection site suitability.
Common Female and Male Body Shapes
Body shapes focus on the visual distribution of weight and fat, which can differ significantly even within the same somatotype. Recognizing your body shape can help in choosing the ideal injection sites for comfort and safety. Learn more about how hormones influence these shapes in our How Hormones Affect Body Shape: The Ultimate Body Type Guide.
- Apple Shape: Weight is concentrated primarily around the abdomen and upper body, often with a larger waist circumference compared to hips. This distribution can affect the amount of subcutaneous fat in the abdomen, making some injection sites easier or harder to use.
- Pear Shape: Fat tends to accumulate around the hips, thighs, and lower body. The abdomen is usually slimmer, which might make thigh injections more appropriate or preferable.
- Hourglass: Characterized by balanced bust and hip measurements with a defined waist. This proportionate fat distribution often allows flexibility in injection site choices.
- Rectangle: Exhibits fairly uniform measurements across bust, waist, and hips with minimal curves. This body shape may have more consistent fat distribution across the body, influencing injection site rotation options.
Understanding your body shape not only supports better clothing and fitness choices but, relevant here, helps in tailoring injection site rotation to avoid repeated trauma to the same area and optimize medication absorption.
Can You Change Your Body Type?
While your fundamental somatotype is genetically determined and cannot be altered, you can influence how your body looks and functions through muscle toning, fat loss or gain, and improved posture. These changes can affect how injections feel and where they are best placed. Body positivity emphasizes acceptance of your natural shape while encouraging healthy habits tailored to your needs.
If you're interested in learning more about how body shape affects lifestyle choices, including injection site management, consider resources such as Apple vs Pear Body Shape: How to Tell & What It Means. These guides provide in-depth advice on working with your natural shape for better health and comfort.
Section 2: Basics of GLP-1 Injection Site Rotation
Why Rotate Injection Sites?
GLP-1 receptor agonists, including medications like Ozempic, Wegovy, Mounjaro, and Zepbound, require regular subcutaneous injections to deliver the medication just beneath the skin. Consistently injecting in the same spot can lead to localized side effects and complications:
- Lipohypertrophy: This is the development of fatty lumps under the skin caused by repeated trauma and local insulin or GLP-1 effects. Lipohypertrophy can hinder medication absorption, potentially leading to inconsistent dosing and reduced effectiveness.
- Scar tissue formation: Injecting repeatedly into the same area can cause fibrosis or hardened scar tissue, which may increase injection discomfort and reduce the drug’s bioavailability.
- Skin irritation and bruising: Frequent injections at the same site increase the risk of redness, irritation, and bruising, which can be uncomfortable and potentially discourage adherence.
Proper rotation of injection sites may help minimize these risks by allowing tissue recovery and promoting uniform absorption of medication.
Fundamentals of Site Rotation
- Use multiple injection sites: Common and safe zones include the abdomen, front and outer thighs, upper arms (outer triceps area), and buttocks. This variety reduces overuse of any one area.
- Rotate within each site: Instead of using the same spot repeatedly, move systematically around the area. For example, in the abdomen, you might rotate injections across four quadrants or around the navel like on a clock face.
- Alternate left and right sides: This strategy not only promotes tissue healing but also helps balance medication absorption and reduces discomfort caused by repeated trauma.
- Maintain minimum spacing: Injections should be spaced at least 1 inch (2.5 cm) apart, roughly the width of two adult fingers, to avoid overlapping sites and reduce tissue damage.
- Keep a log or map of injection sites: Tracking your injection history can help avoid accidental repeated use of the same site within short periods.
Injection Depth and Needle Angle
Most GLP-1 injections are subcutaneous, meaning the medication is delivered into the fatty layer beneath the skin but above the muscle. The depth and angle of injection are important for efficacy and comfort, and can vary based on individual body composition.
- Needle length: Typically ranges from 4mm to 12.7mm. Shorter needles (4-6mm) are often sufficient for many adults when injecting into the abdomen or arm, especially in leaner individuals.
- Needle angle: A 90-degree angle is common for subcutaneous injections with short needles, while a 45-degree angle may be used in leaner individuals or when using longer needles to avoid intramuscular injection.
- Body shape considerations: Endomorphs or those with higher BMI may require longer needles or different angles to ensure the medication reaches subcutaneous tissue and not just the skin layer.
- Pinching the skin: Creating a fold of skin can help ensure the injection is subcutaneous rather than intramuscular, especially in thinner individuals.
Always consult your healthcare provider for guidance on needle length and injection technique tailored to your body.
Section 3: Dividing the Body for Injection Site Tracking
Body Map Zones
Effective rotation depends on a clear framework for dividing the body into manageable, trackable zones. Commonly used injection areas can be subdivided as follows:
- Abdomen: From the lower ribs to the pelvic bone, avoiding a 2-inch radius around the navel to prevent injecting into scar tissue or the umbilical area.
- Thighs: Focus on the front and outer thigh areas; avoid the inner thigh due to higher risk of hitting blood vessels or nerves.
- Upper arms: Target the fatty tissue over the triceps muscle at the back of the arm, avoiding the shoulder joint and bone prominences.
- Buttocks (gluteal area): Use the upper outer quadrant of the buttock, which balances safety and tissue thickness while avoiding the sciatic nerve path.
By defining these zones clearly, individuals can better plan injection rotations and minimize risks.
Quadrants and Clock-Face Sections for Abdomen
The abdomen, typically the most accessible and preferred injection site for many, benefits from subdivision techniques for systematic rotation:
- Quadrants: Divide the abdomen into four equal squares, separated by a vertical line through the navel and a horizontal line across the waistline, resulting in upper left, upper right, lower left, and lower right quadrants. This helps ensure injections are evenly spaced and not repeated in the same small area.
- Clock-face method: Imagine the abdomen as a clock face with the navel as the center point. Injection sites can be rotated around the "clock hours" (e.g., 12 o'clock, 3 o'clock) to methodically cover the entire area over time.
Using these systems can help users avoid overlapping injections, reduce tissue trauma, and support consistent drug absorption.
Left/Right Body Side Rotation
Alternating between the left and right side of the body is a simple yet effective strategy to promote tissue healing and reduce discomfort. For example:
- Inject in the left upper quadrant of the abdomen one day.
- Next injection session, switch to the corresponding right upper quadrant.
- Continue systematically cycling through quadrants and sides.
Recording the site and side used each day in a log or app can help prevent accidental overlap and support a disciplined injection routine.
Section 4: Anatomical Landmarking and Safe Injection Placement
Importance of Anatomical Landmarks
To minimize risks such as nerve injury, bleeding, or injecting into muscle, it’s important to use anatomical landmarks as reference points when selecting injection sites. This practice encourages safe, comfortable, and effective injections.
Landmarking for Common Injection Sites
- Abdomen: Measure at least 2 inches (about two fingers’ width) away from the navel in all directions. Avoid scars, moles, or areas with skin irritation.
- Thighs: Focus on the middle outer third of the thigh, approximately between the knee and hip. Avoid the inner thigh where major blood vessels and nerves are closer to the surface.
- Upper arms: Inject into the fatty tissue over the triceps muscle located on the back side of the arm. To locate, place one hand on your shoulder and the other on your elbow; the injection site is in the fatty area between these points.
- Buttocks: Divide the buttock into four quadrants using a vertical line from the spine and a horizontal line across the top of the buttock. The recommended injection site is the upper outer quadrant, which keeps the injection away from the sciatic nerve and major blood vessels. Palpate the iliac crest (top of the hip bone) and greater trochanter (the bony prominence on the outer thigh) to help triangulate the injection area.
Self-Injection Tips
When self-administering injections, the following tips can improve accuracy and safety:
- Use a mirror: Helps visualize hard-to-see areas such as the back of the arms or buttocks.
- Pinch skin: Gently pinch a fold of skin at the injection site to help ensure the needle enters subcutaneous tissue rather than muscle.
- Clean the site: Use an alcohol swab to disinfect the skin before injection to minimize infection risk.
- Relax muscles: Tension can increase discomfort; try to keep the injection area relaxed.
- Follow injection angle guidelines: Usually 90 degrees for subcutaneous injections, but adjust based on needle length and body composition.
- Ask for professional guidance: If unsure about landmarking or technique, consult healthcare providers for hands-on demonstration and personalized advice.
Section 5: Gluteal Injection Site Selection and Body Shape Considerations
Why Gluteal Site Choice Matters
Gluteal injections differ from other subcutaneous injections because they are often administered intramuscularly (IM), requiring deeper needle penetration. Proper site selection is important to help avoid complications such as nerve injury, hitting bone, or injecting into blood vessels.
Because the gluteal muscle is large and well-perfused, it can be an effective site for some medications. However, GLP-1 medications are typically injected subcutaneously, and buttocks injections require careful technique, especially if used.
Body Shape and BMI Impact on Site Selection
Body shape and BMI influence fat distribution, which in turn affects needle length choice and injection depth. For more detailed information on how body shape influences medication effectiveness, see our Body Shape Influence on Medication Effectiveness: A Complete Guide:
- Apple-shaped individuals or those with higher BMI: Tend to have more adipose tissue in the gluteal region, which may require longer needles to reach the muscle in IM injections or careful technique to ensure a subcutaneous injection. In some cases, alternative sites like the abdomen or thighs might be preferred to avoid excessive needle length or discomfort.
- Pear-shaped individuals or those with lower BMI: Typically have less subcutaneous fat in the buttocks, which requires precise landmarking to help avoid injecting into bone or causing nerve injury. Shorter needles and careful angle selection are important for safety and comfort.
Considering these factors highlights why injection techniques should be tailored to each individual's anatomy and body composition.
Common Gluteal Landmarks
- Divide the buttock into four quadrants by drawing an imaginary vertical line from the spine down the middle and a horizontal line across the upper gluteal region.
- The upper outer quadrant is generally considered the safest and preferred injection area, minimizing risk to the sciatic nerve and major blood vessels.
- Use the iliac crest (the top curved edge of the hip bone) and the greater trochanter (bony prominence on the outer thigh) as tactile landmarks to help find the correct injection spot. The injection site is generally located about midway between these landmarks.
- For self-injection, this site can be hard to reach; assistance or alternative injection sites may be necessary.
Section 6: Tools and Apps for Tracking Injection Sites
Printable Logs and Body-Outline Charts
Traditionally, patients have used printed body maps and injection logs to track site rotation manually. These tools remain effective for visualizing injection patterns and preventing repeated use of the same spot:
- Printable charts featuring body outlines divided into quadrants or clock-face segments allow clear marking of injection sites.
- Daily logs or calendars can record injection date, time, dose, and site, helping to maintain consistent rotation and spacing.
- Some printable resources include color-coded or symbol-based systems to track side effects or discomfort at specific sites.
- These tools can be customized or adapted to personal preferences and needs.
App-Based Trackers with Interactive Body Maps
Digital solutions have transformed injection site tracking by adding interactivity, automation, and integration:
- Interactive body maps: Apps like Trimm provide detailed digital body outlines where users can tap or click to log injection locations, supporting precise site tracking.
- Reminders and alerts: These apps can send notifications to remind users when and where to inject next, reducing human error and improving adherence.
- Integrated logs: Beyond site tracking, users can log medication doses, side effects, weight changes, and other health parameters, offering a comprehensive view of their GLP-1 therapy journey.
- Data insights: Some platforms analyze injection patterns, helping users and healthcare providers identify trends such as frequent site reuse or correlations between injection sites and side effects.
- Accessibility: Mobile apps allow tracking on-the-go, syncing across devices, and often include privacy features to protect user data.
Trimm, for example, offers a streamlined and user-friendly interface designed specifically for GLP-1 medication users, supporting personalized tracking and engagement. For guidance on selecting the best app for your needs, see the Best App for GLP-1 Tracking: Your Complete Guide.
Benefits of Digital Tracking
- Improved accuracy and consistency: Digital tools can reduce guesswork and help maintain systematic site rotation, which is important for avoiding tissue damage.
- Convenience: Mobile reminders and easy logging encourage adherence to injection schedules and site rotation protocols.
- Enhanced communication: Data collected can be shared with healthcare providers for personalized advice and intervention.
- Motivation and engagement: Visual progress tracking and symptom logging empower users to actively participate in their treatment journey.
Conclusion
Tracking injection sites by body shape is a helpful practice in the safe and effective management of GLP-1 medications. Understanding your somatotype—whether ectomorph, mesomorph, or endomorph—and your body shape—such as apple, pear, or hourglass—can help tailor injection site selection and rotation strategies to your unique anatomy.
Dividing the body into quadrants or clock-face sections, applying anatomical landmarks, and alternating between left and right sides can help ensure injections are spaced adequately to reduce the risk of lipohypertrophy and scar tissue formation. These strategies may promote consistent medication absorption and reduce discomfort.
Gluteal injection site choice requires special consideration of body shape and BMI since these factors influence fat distribution and needle length. Proper landmarking helps avoid nerve injury and supports effective delivery.
Both traditional printable logs and modern digital tools like Trimm facilitate precise and convenient tracking of injection sites, doses, side effects, and progress. These resources can empower you to maintain a consistent and safe injection routine aligned with your health goals.
Remember, all decisions related to injection technique, needle length, and medication management should be made in consultation with your healthcare provider. Personalized guidance ensures that your injection plan is safe, effective, and tailored to your individual needs.
FAQ
Q: How do I rotate injection sites on my body to avoid scar tissue or lipohypertrophy?
A: Systematic rotation is key. Use different body zones such as abdomen, thighs, upper arms, and buttocks, divided into quadrants or clock-face sections. Alternate between the left and right sides of your body. Maintain at least 1 inch (2.5 cm) spacing between injection sites to allow tissue healing and reduce the buildup of fatty lumps or scar tissue. Keeping a log or using an app can help ensure you don't repeat the same site too frequently.
Q: What is the best way to mark injection sites on a body map or chart?
A: Use body maps that clearly divide injection areas into manageable zones or quadrants. Mark each injection site with the date to visualize rotation patterns and avoid repeats. Printable charts are useful, but interactive digital maps in apps like Trimm allow precise site marking, reminders, and integrated tracking of your entire injection schedule.
Q: How far apart should injection sites be spaced from one another?
A: Aim for at least 1 inch (2.5 cm) between injections. This spacing helps prevent overlap of injection trauma, reduces risk of lipohypertrophy, and supports consistent absorption of medication.
Q: Which injection sites are safest or easiest to use for self-injection?
A: The abdomen is usually the easiest and most convenient site for self-injection because it has ample subcutaneous tissue and is easy to reach. The thighs and upper arms are also common options. Buttocks require precise landmarking and are generally harder to self-inject safely, so they often require assistance or professional administration.
Q: How do I choose the correct gluteal injection site based on body shape?
A: Use anatomical landmarks to locate the upper outer quadrant of the buttock, which is the safest area, avoiding the sciatic nerve and major vessels. Consider your body shape and BMI when selecting needle length and injection depth. For example, those with higher BMI or apple-shaped bodies may need longer needles or alternative sites. If unsure, consult your healthcare provider for personalized instruction.
Q: Are there apps that track injection sites and rotation history?
A: Yes. Apps like Trimm offer interactive body maps, injection logs, reminders, and integration with weight and side effect tracking. These tools support consistent, safe injection routines and provide helpful insights into your GLP-1 therapy progress.
Free to start
Try the Trimm app
Everything in this guide, in your pocket.
Get it on iPhoneGet it on Android